One of my resolutions this year is to give back to the photographic community. Especially those just starting out and learning about lighting. So today's post is about using one light for portrait sessions.
For this assignment I was actually going to use two lights, but I had problems with one of my triggers and went without it. This light was to add a bit of light to the background and help separate the subject from the background, especially those with dark hair. The portraits still looked good and no one realized that I had equipment malfunctioning. There are several ways to do a portrait session with one light and with different modifiers, this is just one way.
Here is a drawing for the light setup. I found an iPhone app that allows you to create these setups and even share them by e-mail. The app is by
Strobox, you can get the
app through the iTunes Store for free.
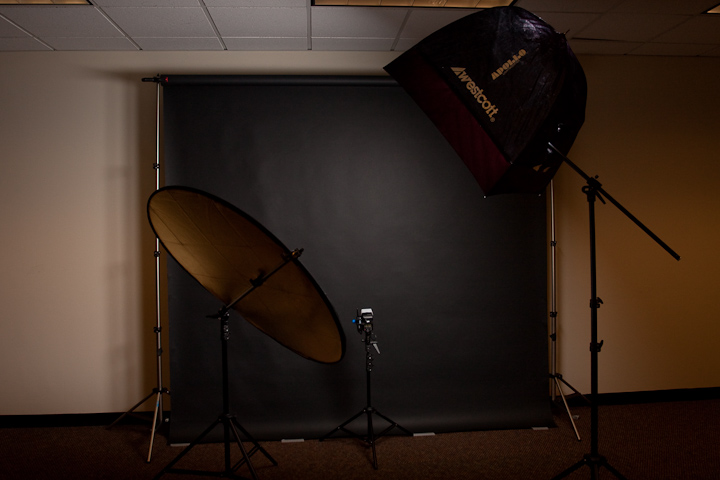
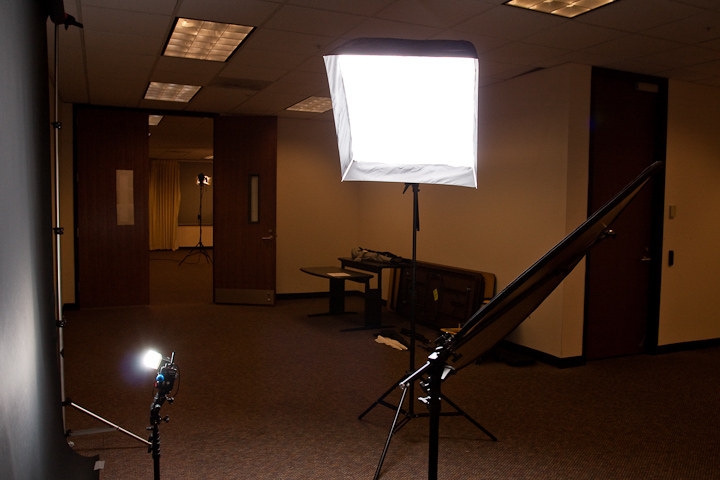
Here are a couple shots of the setup. I need to remember to take these more often. It may make it easier to see the setup than the drawing.
Okay, So you see the setup. I'm using a Canon 580EXII at 1/2 power as my main and only light. It's sitting inside a Wescott Apollo 28" Softbox. I typically set my flash at 1/2 power as a starting point. This allows for quicker recycle times and improves on battery life. If I have to adjust the flash exposure, I can adjust the aperture on my camera instead of making adjustments to the flash. As you can see from the setup shots, I'm inside a typical office environment with fluorescent lights. I've got 2 different color temperature on these lights which would cause a problem. Fortunately, the flash overpowers the ambient fluorescent and I can cut down the ambient even further with a faster shutter speed. So no problem with getting greenish skin tones from the fluorescent lighting.
The key to controlling your exposure is this: Shutter speed controls your ambient and aperture controls your flash (subject) exposure. All these controls are on your camera and can be controlled independently when your camera is set to Manual.
I chose to go with the softbox, because it's a light modifier that diffuses the light, similar to what you'd get from a window. It creates soft shadows and creates beautiful light, perfect for portraits. The softbox alone would only light one side (right) of the face. This is where the reflector comes in. I have a 42"combo reflector that allows me to use it as a diffuser or reflector with gold, silver, or white surface. I used the white surface and positioned it so that some of the light from the softbox would bounce off the reflector and light the left side of the face.
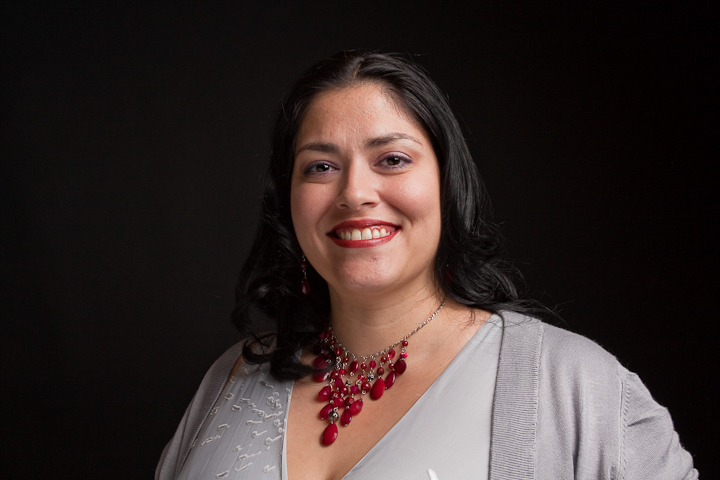
Here are some examples of this setup.
When I first started looking into lighting, I thought I needed to have at least 3 lights. As you can see, one light is sufficient for portrait work. Most times that's all I'm using, especially when I work outdoors.
So if you're getting into photography and considering using lights, don't think you need to spend a lot on multiple lights. One light and knowing how to use it can make some pretty remarkable photos. Take a look at my portfolio, all one light. I've only used 2 lights for a larger family session. I'll cover that in another post.
Feel free to ask me questions about lighting and gear.
If you're looking for a portrait photographer in the Atlanta area, visit my
portfolio.


3 comments:
Nicely done, David. Great photos too. Perhaps next meet, you can do this same setup to share with the group.
That's a great idea. Since we'll be indoors, it'll make it easier. Maybe even shoot some video of it. I don't like being on camera, but if it helps teach others, I'm in.
Nice job David!
Post a Comment